Google Voice Setup Instructions
Please click here to open/download the PDF document that explains how to setup Google Voice.
Setting Up Your Free Phone Number
Setting up your Creditor Communication Number
Unfortunately, creditors and debt collectors often use the telephone to try and collect their debts.. Below is our advice on how you can further minimize the annoyance of these calls.
Utilizing the Google Voice system
Google Voice will give you a new phone number for free. Anytime a creditor calls simply state that you can longer take calls at your current number and to direct all calls to your new number. Do not tell them it is a Google number. From that point on, when your creditors call, the phone won’t ring on your home or cell phone, it will simply go directly to your Google voicemail. These voicemails will then be sent directly to your email account. Sounds simple? It is.
Google Voice will also allow you to email the voicemails to us if you think they are FDCPA violations. You will be able to record calls if you need to and easily send us those recordings as well, but that is for another training. For now, let’s get started …
Step 1: Go to http://www.google.com/googlevoice/about.html
This link contains videos and tutorials on all the Google Voice features. You can cut and paste this to your address bar on your computer in order to access it quickly. Be sure you insert the website in the thin address bar at the top left of your screen and NOT in the search bar. Once you are in the site and on their page, you can click on “Try it now” to go through the sign up process.
Step 2: Sign up for a Gmail account, also free.
If you already have one, just use your existing Gmail account. If you do not have a Gmail account, simply follow the “create an account” steps. It only takes a few minutes.
Once you have your Gmail account established, come back to these instructions for Google Voice setup.
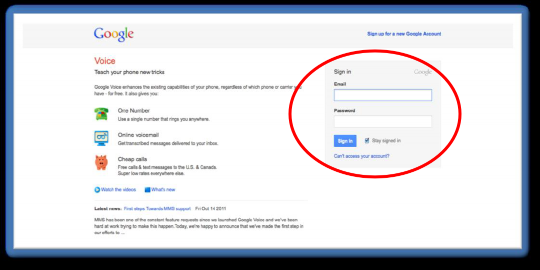
Step 3: Go to Google Voice at this link https://www.google.com/voice and sign in.
You use the same sign in information for your Google Voice as you do for your Gmail account:
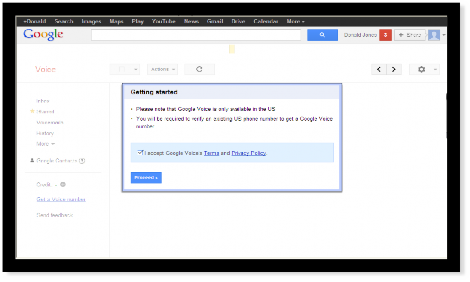
The next screen to pop up will be the “Getting Started” screen on which you will be informed that Google Voice is only available in the US and that you will be required to verify an existing US phone number to get a Google Voice number. This is important to remember because later you will be asked to “choose a number.” The number you pick MUST be provided by Google Voice – you can’t make a phone number up in your head and use it.
Now, check the box in this screen that says: “I accept Google Voice Terms and Policy.”
Step 4: Choose a new number
The first time you log in, the system will ask if you want a new number. Yes you do, so choose that option.
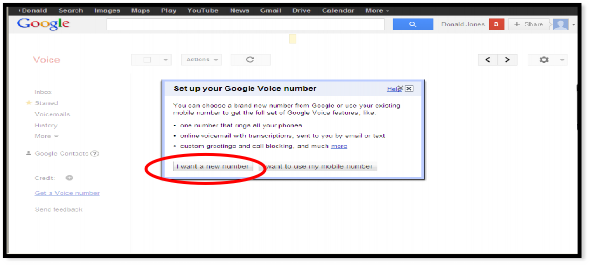
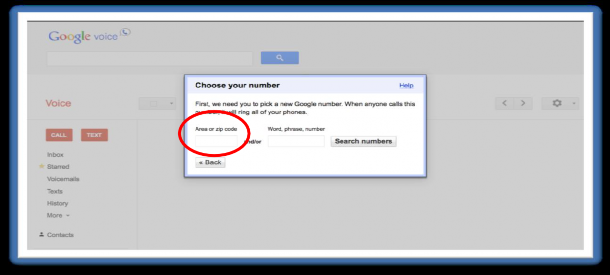
The service allows you to use your existing mobile number but for our purposes, we want a brand new number for you. In the next screen shot you will see that Google voice asks you to choose an area code. Choose your local area code and click “search numbers.”
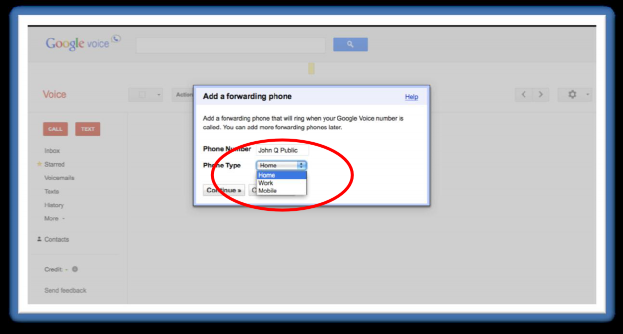
Next it is going to ask you, which phone number you would like this forwarded to.
**This is a temporary setting you will choose to verify the account. Once you have completed the process of setting up your Google Voice number, you will change the settings so the calls go directly to voicemail and don’t bother you**
The system will ask you if you want to forward to your home or mobile number. Either is fine, as long as you will be able to answer that phone when the system calls you to verify the number.
This is to make sure you are a real person, and it will also allow you to record your voicemail greeting.
After you are finished with this process you are going to disable this forwarding so that the calls go straight to voicemail. You will not receive calls on your home or mobile phones, only on the Google Voice number you are setting up now. This number is exclusively for your creditors or collectors.
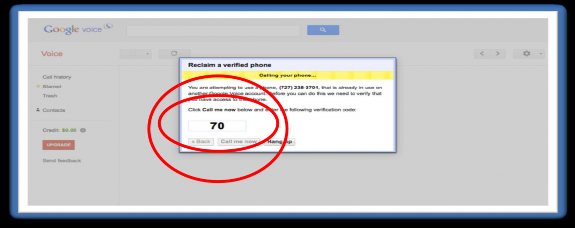
Once you have chosen your home or mobile number it will prompt you to enter that particular phone number. After you have entered it you will be asked to verify that number by calling it, as you can see in the screen shot below.
BEFORE YOU CALL THIS NUMBER BE SURE TO READ THIS PAGE THROUGH
You will be given a two-digit code to enter on the page in order to verify your phone. However, there is more to do while on the phone at this point, so DO NOT hang up after you have entered the code. Continue to listen to the instructions given in the phone message before disconnecting.

Click “call me now” and Google voice will automatically call the number you entered. When you answer the call they will ask you to enter the two-digit code shown on
your computer screen. Then you are going to record your voicemail greeting as well, so read the next step first.
Step 5: Verify the account and record your voicemail
Once you have entered the code displayed on your computer screen into your phone, you will be asked to record a voicemail. You should record your message with this script:
“Hello you have reached the (your last name) family, please leave a message after the tone”.
It is important that you record the message according to this script. Remember, this voicemail will be primarily for your creditors, and the voicemail recording suggestion we have made could help you document a potential third party disclosure violation in the future.
Once you have recorded your voicemail, listen for the voice prompts to save it.
Once you verify your account and set up your greeting, this is where you choose your number from the choices they provide you. Remember, you do not make this number up in your head – follow the next instructions:
This will search for all numbers available in the area code you choose. You can just scroll through and choose the one you would like.

Once you have made your choice, click on the dot beside it and then click “continue” at the bottom of the page. If there are no numbers available in the area code you have chosen, then try another area code.
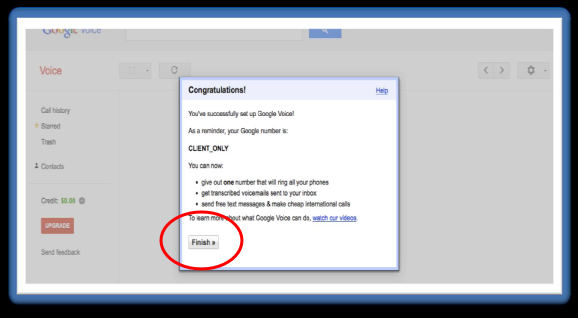
When it is saved, you can click “Finish”.
Now, go back and check that everything was done correctly. Simply follow the next steps to complete this.
Step 6: Make important adjustments to the settings in your system
All of the settings you need to adjust can be found in the “Settings” Section, as you can see circled in the picture below. Click the “cog icon” as seen circled below now.
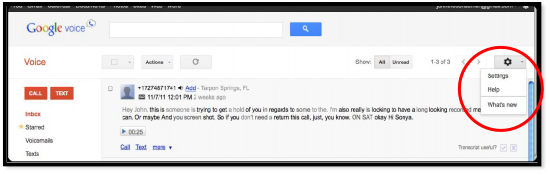
Then, click on the word, “Settings.” The following screen will appear and youcan enter the “Calls” Tab as illustrated below by clicking on the word, “Calls”:
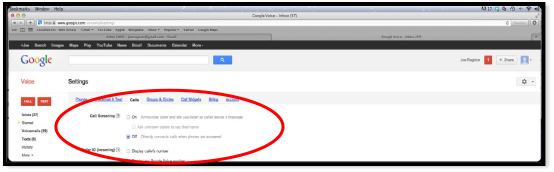
Step 7: Adjust the Caller Announcing
Google Voice gives you a couple of options regarding caller announcement. They are circled in red in the last picture. They are Call Screening and Caller ID.
IT IS VITALLY IMPORTANT THAT THESE SETTINGS ARE CORRECT.
First, make sure you have CALL SCREENING OFF. You don’t need it because these calls will be forwarded directly to your voicemail, and if it is on, your creditors may not leave you voicemails.
Second, make sure you DO NOT check the box that has the caller announce their name. This may cause your creditor to decide not to leave a voicemail.
This box usually remains unchecked when you click Call Screening Off. However, in the odd instance where it may be checked, uncheck it. Just leave the rest of the options as they are. Should they need to be changed, we will inform you in the future.
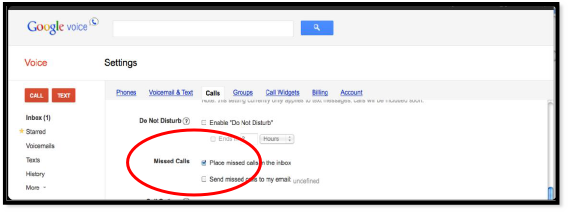
Step 8: Missed Call Options
With this system you can choose to keep track of the missed calls that come into your Google Voice number. This will help you if you are getting multiple calls per day, and will let you know exactly who is calling and when. If these are calls from collectors, this could help us stop the calls and possibly obtain an award of damages for you. Choose the option to send missed calls to your inbox as illustrated below.
By choosing this you will now have a record of all the calls that come into your Google Voice system. If collectors call you before 8 AM or after 9 PM, that is a violation and you could have rock solid evidence to sue the collector.
Just leave the rest of the options under the “Calls” tab as they are. Should they need to be changed, we will inform you in the future.
Step 9: Sending calls straight to voicemail
Now that everything is set up, click on the “Phones” tab, which is to the left of the “Calls” tab on the same page. This will bring you to the screen shot below:

In the “Phones” Tab you can see that your home phone number (or whichever one you choose) is currently checked so calls to your new number will currently be forwarded to it. We want those calls to go directly to voicemail so that you are not bothered by the calls… so uncheck that box.
As soon as you have done this, all calls will be directed to the voicemail you recorded. Now, let’s check that your Google voicemail is set up correctly:
Step 10: Check your voicemail recording
In “Settings” (the same page you’ve been working on), click on the “Voicemail & Text” tab, which is to the right of the Phones tab. Here you can check the recording of your voicemail. Make sure your speakers are on and turned up. If you don’t have working speakers on your computer, call your Google Voice number from another phone and leave yourself a test voicemail message. Click on “Play” (shown circled in red) and you should hear the voicemail you just recorded.
It should say, “Hi, you have reached the (your last name) family, please leave a message” - or something very close to that.
If it does, great! Move onto the next step. If it doesn’t – re-record your voicemail. To re-record your message to be in line with our recommendations, follow the instructions below: Click on “Record New Greeting” (circled in blue below)

You will see another box on the screen entitled “New Greeting.”

Just click on “continue”, and the next box will appear on your screen, as seen below.
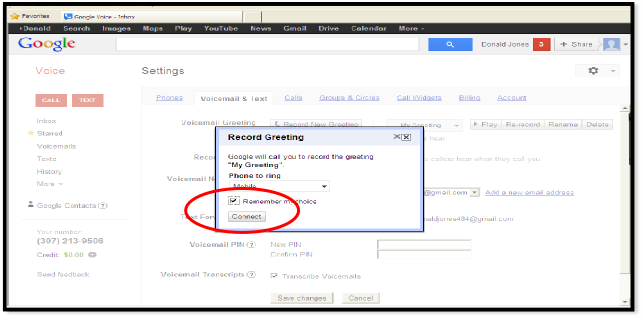
Click on the word, “Connect” at the bottom of the box and Google Voice will call your telephone in order for you to record a new greeting. The system will call the number you chose when you set up the account; you should see it named in the drop down as a choice.
When the system calls you, simply follow the instructions as given and be sure to save your greeting as you are instructed.
Once that is complete, just go back to the start of step 10 and check the recording again.
Step 11: Test your system
Call your new Google Voice Number from a phone other than the one you used to set up the Google Voice number. The line should ring – no other phones should ring. When the line picks up you should hear the voicemail greeting you just recorded. Leave a message and then hang up and check your email to hear the message.
If, when you call your Google Voice number, you hear anything other than your own recorded message, something is not set up correctly.
For Example: If you hear a message announcing your name, go back to Step 7 and make sure your settings are correct.
If you hear “the Google Voice subscriber is not available” then something is wrong with the recording of your voicemail. Please refer to the other supporting document on the Basic Training page or in your Training Archive. It is titled “How to re-record your greeting.”
If you still cannot get the system to play just your voicemail greeting when you call, and you have checked all the settings, then call us and we will assist you.
If you call your Google Voice number and you hear your voicemail greeting, you’ve succeeded! Leave yourself a message and we will show you where to find your voicemails.
Step 12: How to get your voicemails

Your voicemails will now appear in your Gmail inbox, or wherever you decide to forward them as emails to you. To listen to them, simply open the email and you will have the opportunity to play the message.
Clicking on the message will lead you to your Google Voice account as illustrated below.
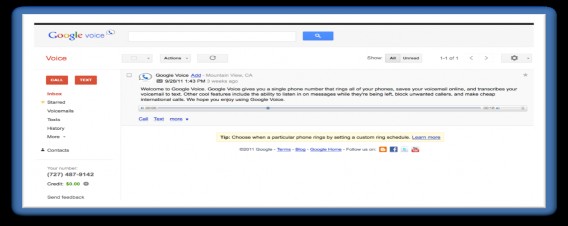
All your messages are saved in your Google Voice account until you delete them.
If you receive a message that you think may be a violation of your rights, or even if you just have a question about it, there is an easy way to send us that message with your questions or comments.
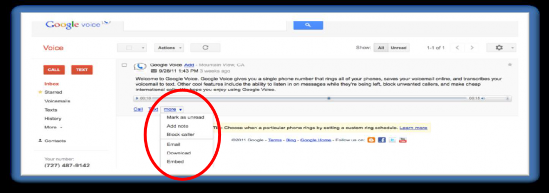
Step 13: Sending voicemails to Collection Protection
In our next screen shot you will see that we have highlighted the “more” option which will show you a drop down box that gives you the option to email that voicemail. If you want to send us the voicemail, all you need to do is click on this.
Once you have chosen to email this to us, you will see the screen shot below…
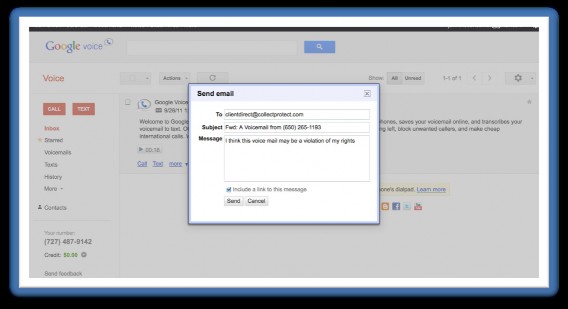
Now simply forward the emailed recording that came to your inbox. Please provide a brief explanation of why you are sending it. This will be sent to one of our attorneys who will review the recording for violation.
Either way, please forward the email to us now and just type in “testing my system” somewhere in the message box or on the subject line.
You will find information, training and instructions on this in the Enforcement section of your database.